
Since version 3.1, DroidUX libraries are available in Android AAR binary distribution format. This format makes it extremely easy to use DroidUX libraries in your Android app projects. This is especially true if you’re using Android Studio as your IDE. However, it should also work with any IDE that support using the AAR such as Eclipse and others. We recommend that you use the AAR package, whenever possible, if you’re using DroidUX components in your app project.
To use DroidUX AAR packages in your Android app project using the Android Studio IDE, just follow these steps:
1. Create new application project (or use existing one).

2. Add the DroidUX Core library .JAR into the project.

Put the DroidUX Core .JAR library under the app’s libs/ folder (1). And make sure that the app’s build.gradle configuration includes dependencies to the libs/folder, the android-support-v4 and the appcompat-v7 libraries (2).
3. Add the component .AAR packages into the project.
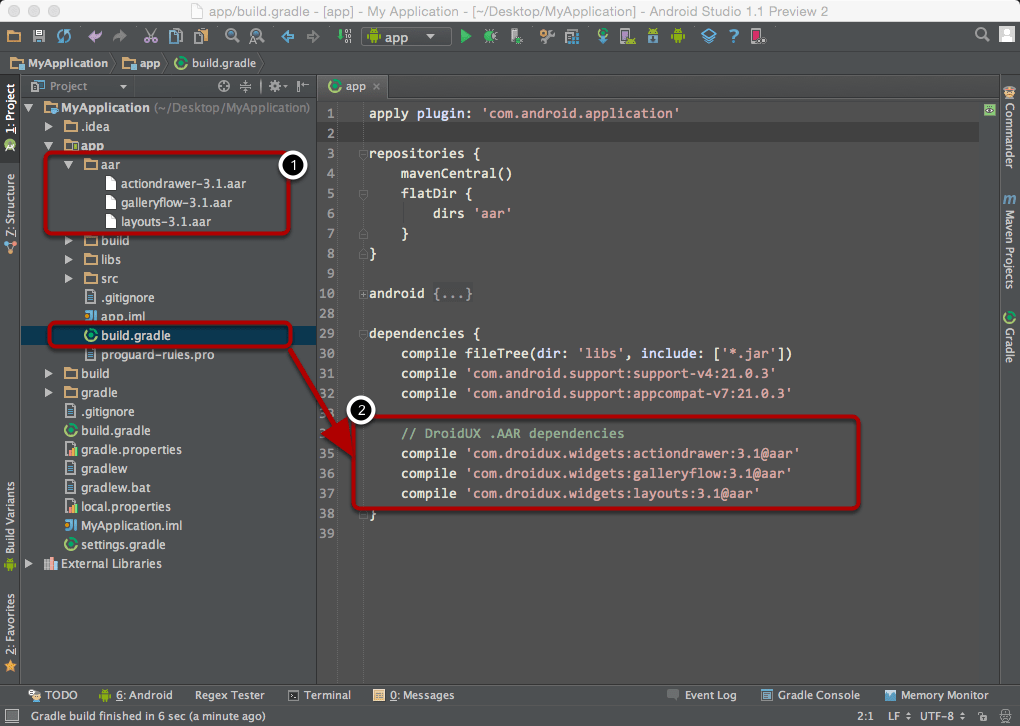
Put the .AAR packages containing the components you want to use, under the app’s aar/ folder (1). Create the aar/ folder if it doesn’t exist. Then update the app’s build.gradle to include the DroidUX .AAR packages as dependencies (2).
|
1 |
compile ‘com.droidux.widgets:<library-name>:<version>@aar’ |
4. Register DroidUX library in your custom Application class.
Create a custom Application class for your app, and register DroidUX library with your valid license in the overridden onCreate() method.
Note: For DroidUX v3 libraries, you only need to register once for all modules included in your app project.
|
1 2 3 4 5 6 7 8 9 10 |
public class MyApp extends Application { @Override public void onCreate() { super.onCreate(); // Register the DroidUX v3 library DroidUxLibrary.register("enter-your-api-key-here", this); } } |
5. Update the manifest to use the custom Application class.

Update the AndroidManifest.xml file to use the custom Application class created in the previous step.
6. You’re now set to go and build your amazing killer app using DroidUX .AAR packages.